Showing posts with label budget. Show all posts

2013/07/31

Quickie Work Bench : A table from six scraps

Last year I pulled these six scrap boards from of a dumpster behind an old Ingles. They're pretty badly cupped but otherwise solid, hard yellow pine 2x12s.
A sharp, functional work bench is quickly constructed from rescued hard yellow pine boards. (easy DIY work table) 
It's amazing what people get rid of during a tear-out.

I squared up the boards and made some rips.
A sharp, functional work bench is quickly constructed from rescued hard yellow pine boards. (easy DIY work table)
All of the wood for this project is stacked on the left. The only scraps are on the right.

You may have noticed that for way too long I have worked without a bench. Cuts were made out on the deck and most pieces were assembled on the floor.
A sharp, functional work bench is quickly constructed from rescued hard yellow pine boards. (easy DIY work table)
So this is long overdue. 
A sharp, functional work bench is quickly constructed from rescued hard yellow pine boards. (easy DIY work table)
 It's a simple design from scrap lumber and it went together quickly. If every project could be like this...

A sharp, functional work bench is quickly constructed from rescued hard yellow pine boards. (easy DIY work table)
 I won't be making any more cuts out here.

This helper really digs it.
A sharp, functional work bench is quickly constructed from rescued hard yellow pine boards. (easy DIY work table)
 He also helped me install additional bracing from the leftover cutoffs.
A sharp, functional work bench is quickly constructed from rescued hard yellow pine boards. (easy DIY work table)
Little known fact about furniture biology: tables asexually reproduce more tables. It's a fascinating life cycle.
] j [

2013/06/17

Hutching a Plot: Clover's Rabbit Hutch Pt. II

Clover the cuddlebunny has a contract with CARPEntryDIEM.blogspot.com
In case you are wondering, yes I have a contract with Clover.

We left off with an array of boards reclaimed from Sierra Nevada.
magic number 16 displayed on two critical future siding boards

From the first stack of wood I salvaged from smaller pallets, I set to making structural members. Using the rip fence on my trusty little circular saw, the heavy duty supports were ripped in half.ripping down heavy-dut pallet supports to salvage for use in a rabbit hutch
This yielded twelve sticks at 42" to use for framing.
drips are caught on an unfinished painting from an AAAC painting party
As I went, selecting boards to fill in a complete sketch and ripping where required, the wood was painted to finish prep.I chose a dark purple from the return section of a local mega-chain hardware store. I usually try to snag my paint from these racks at a big discount.
boards salvaged from Sierra Nevada pallet lumber are stacked after painting
 The idea is to provide a complete base coat on all surfaces of the untreated lumber, even unexposed end-grain cuts when possible. The final coat will come from only half a quart of a brilliant red, which should create a streaky, rustic finish as it fights to cover the darker purple.first step toward framing, front and back frames are painted on end grain and countersink holes
Basic framing is completed before transporting material to the site. I painted hidden end grains and countersink holes on the front and back walls of the covered portion of the hutch.

covered portion of the rabbit hutch is framed out rough
 Here is the rough framing for the covered section of the hutch.
four walls of the covered portion of the rabbit hutch with siding complete
 Now with siding complete, it begins to feel like home.
framing for the open portion of the rabbit hutch is begun, front door is tested
 The open section is connected and the front door is tested.
rabbit hutch is complete, front / side view
the rabbit hutch is complete, rear door view
The front and back door function with simple block latches.
completed rabbit hutch, front / sode view showing open door / bunny ramp / hutch hatch
The metal roof was cut from a piece of scrap. Most of the fasteners were leftovers or salvage from previous projects. Rubber washer screws, elevator bolts, mesh and fence staples were purchased new.
completed rabbit hutch, rear door open
A big thank you goes out to Don Schjeldahl of Sierra Nevada for the opportunity. And also to the Rimer family for trusting me to build this fun and fulfilling little farm house. If anyone has a truck and an idea, I would love to gather more wood from Mills River and build another dream . . .

2012/04/20

Corner Bookcase is here


The twelve slats from the futon frame are marked for layout and assembly.
After using the six odd boards from the reclaimed futon frame for my personal experiment, it's time to move on to the production piece.
The twelve members to the right are used to assemble the newly designed corner bookcase.

Each of the twelve remaining boards measures 51-3/8 x 2-1/2 x 3/4 (inches).
Four members compose the basic frame for each half of the corner bookcase.
Two similar panels are constructed as above, and interlocked below.
The two basic panels are blocked out together to rest for square and fit.
The back half of each shelf is then attached.
The detail shows how the panels interlock after the final two members are added to each panel.
This detail shows how the two pieces of the frame interlock.
The Corner Bookcase via the sawdust filter...
The connection is made with dowels so that the case can be split apart and transported.


The first bookcase, made from the six odd-sized members, illustrates the idea of giving objects plenty of space within the shelves.
If you give the objects enough space, as above, there will also be room to hang small art pieces within and around the two frames. I will move the Corner Bookcase into Hip Thrift tomorrow, so look for the update.

] j [

2012/04/19

A Very Lightweight Bookcase: Rough Design

Against the near wall in my workshop are 18 boards reclaimed years ago in Brooklyn from a broken futon frame. It sure did take a long time for this bastard wood to tell me what it wanted to be: a complete departure from my previous pair of bookcases.
leaning against a wall of my workshop are 18 boards reclaimed from a broken futon frame. The nearest 6 boards were used to build a functional rough design.
Using only the four short and two long boards, I set myself to the task of making an experimental bookcase for my own use.

This model is low and long and close to the ground, well suited to my "Spartan living style" (as described by motorcycle fabricator Norm Plombe).
The rough design is finished and placed, without books.
The shelves are rather narrow and bouncy, and the bottom "shelf" is the floor itself. These factors make the prototype unsuitable for mainstream consumption, but perfect for my meager needs and open spaces.
Here, the finished rough design is shown filled with most of my book collection, down to less than 20% of its prior typical size . . .

Using the remaining twelve regular boards, the upcoming shelf will more than double the weight of my experiment. It will also measure twice as tall and nearly twice as long, gaining stability by wrapping completely around the corner. After framing it I will decide on the use of backing, which would bring another material element into play. I hope instead that my design can allow the bookcase to fit snugly against the wall.

] j [

2012/01/26

Working Wood for Gaynor

2010 was ages ago!  For many months I took on the role of doting handyman in Williamsburg, Brooklyn for my dear friend Gaynor and her two ageless Siamese cats, Oyster and Sosumi (named by an attorney).  I was connected to Gaynor through the eccentric artist and conservation botanist Bill Moye, who some readers are bound to know.

I have chosen a couple of highlight projects, with photos furnished by resident Williamsburg woodworker Japheth March.  In addition to the projects below I repaired furniture, doors, frames, windows, sills, screens, storm windows, sheds and sculptures; installed AC units in both vinyl and wood window openings; installed industrial metal shelving; replaced a vintage mail slot and light fixtures; weatherproofed a neighbor's faulty retaining wall; insulated the rear wall of the building adjacent to the mechanical room; cleared ancient doors, paint cans, debris and small corpses from the back yard; planted and transplanted various plants; and performed quite a few other sundry tasks . . .
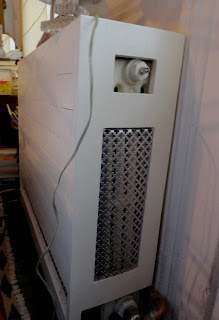

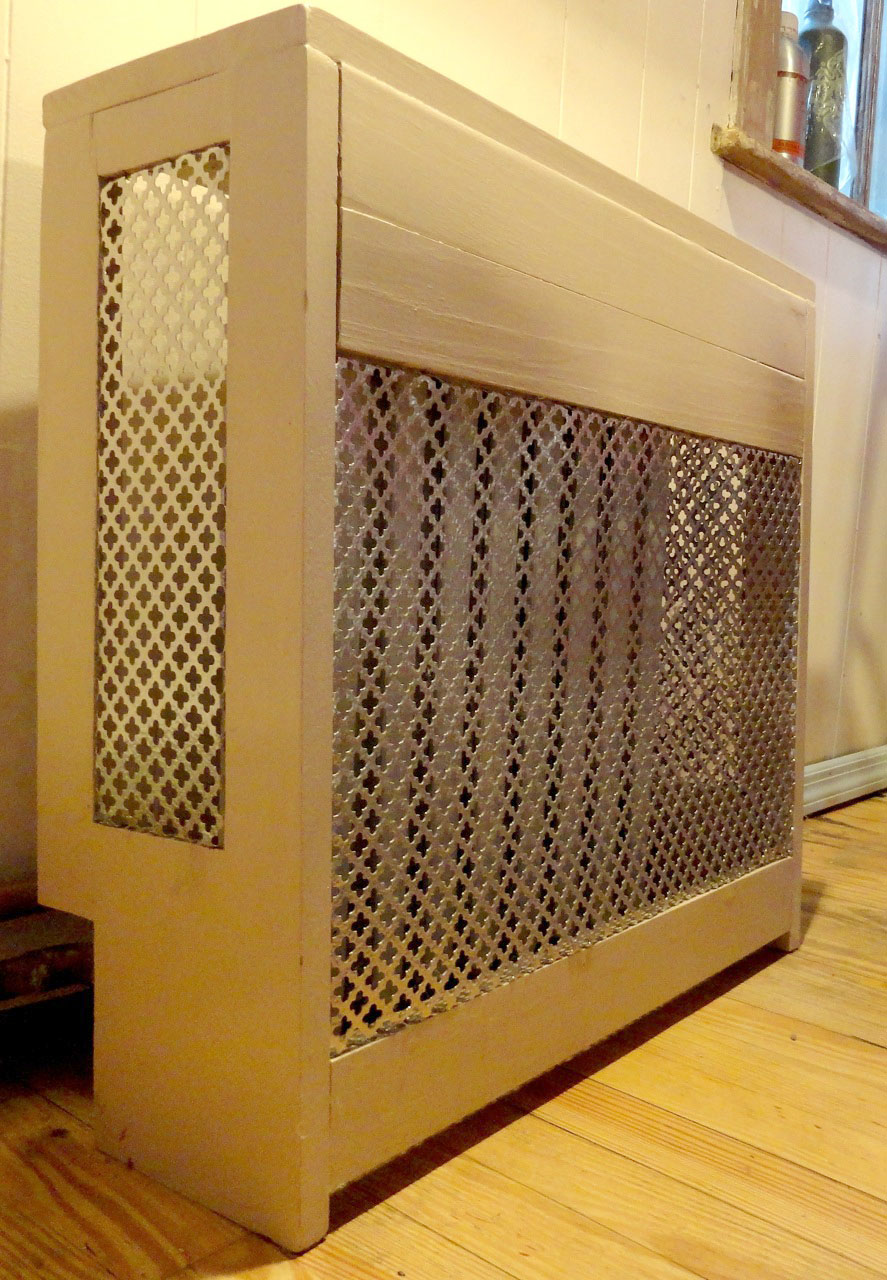
Upstairs and downstairs radiator covers were built on the cheap from hardwood planks in a rustic style matching the detailed settling of the rest of the house.  The uncovered radiators had previously been a cause for annoyance under the kitchen table and behind the headboard of Gaynor's bed.  Apparently, the cats greatly enjoy the new heated surfaces, which do a proper job of dispersing heat rather than having it collect all in one place.


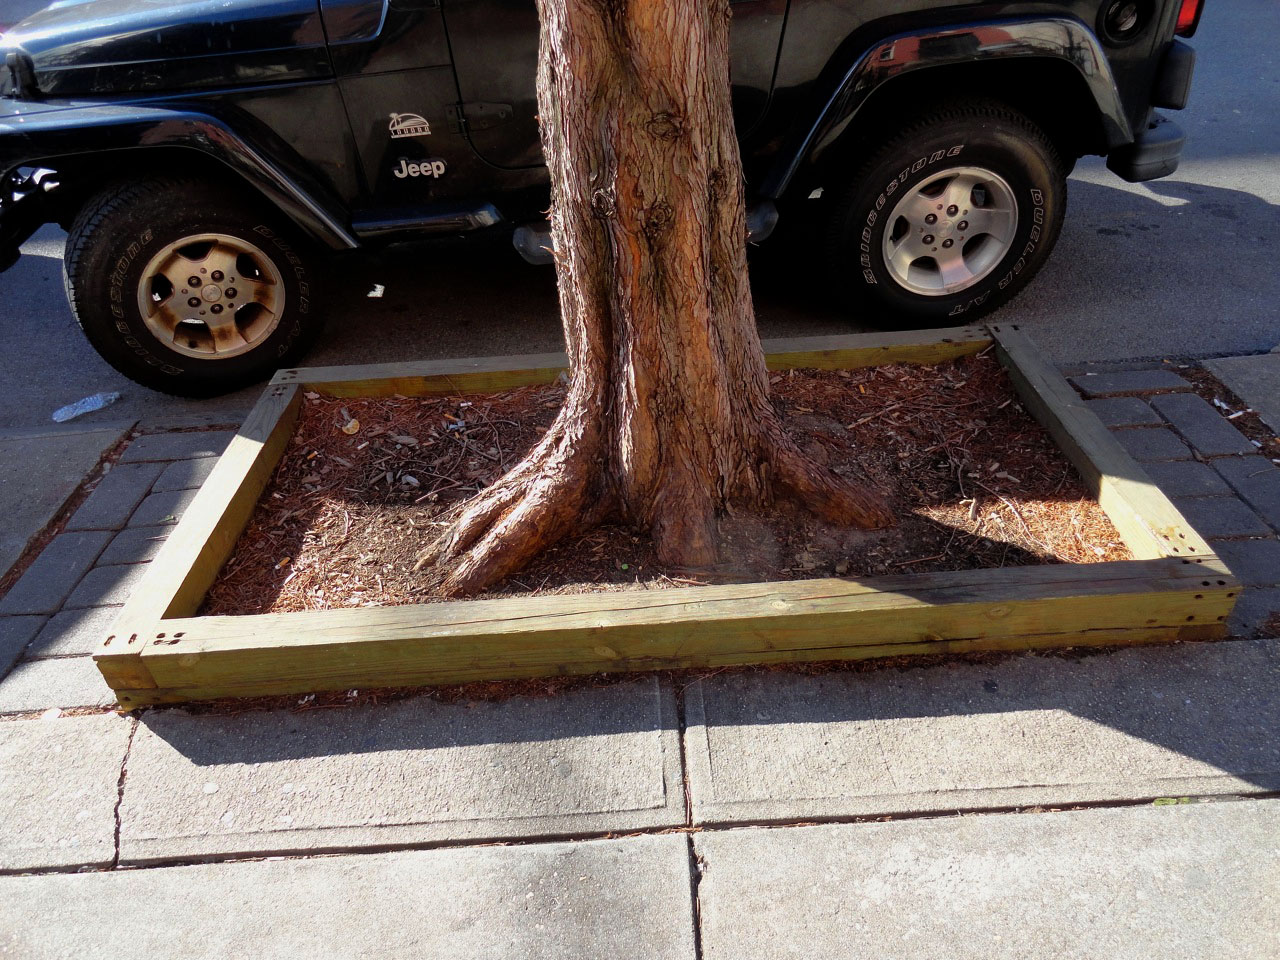
The tree surround and planter box were also rustic budget projects, assembled with minimal lengths of treated lumber.  My only regret was that I paid too little attention to the fasteners used in the tree surround, but functionality was our main concern.  As opposed to the previous tree surround which was easily pushed around by cars attempting to parallel park, the one is deeply anchored, set on stone and brick, and not going anywhere.  It was also expanded to give more room to the typically constricted roots of a suffering Brooklyn sidewalk tree.  Both the original planter and tree surround appeared fittingly weathered and eroded. I tried my best to impart this look upon the new pieces while ensuring a long lifespan.

Neither of these projects made use of reclaimed material. Unfortunately, time does not always allow for us to be choosy about the wood we use.  Now that I have a little workshop, I am on the lookout for wood to reclaim for use in future endeavors. If you run across wasting wood in Asheville, please let me know!
___
] j [

EDIT: outdoor projects are heavily treated with Japheth's patented secret blend of Turpentine and Linseed Oil.